Friday, July 11, 2014

Mini Writing Assignments


Most state test writing demands two things- the ability to use the techniques of the genre and to think on your feet. The one thing lacking in many ELA classrooms, often including my own, is giving students time to think, plan and create.  These opportunities do not have to be overly time consuming, but can increase student motivation, creativity and strengthen their thinking skills. The Common Core Standards support each idea below and depending on the depth of the assignment, takes very little planning to accomplish. Ultimately providing more challenging writing ideas help our students to think on their feet AND instills motivation and inspiration about the limitless possibilities of writing.

Visual Poetry

W.8.6. Use technology, including the Internet, to produce and publish writing and present the relationships between information and ideas efficiently as well as to interact and collaborate with others.

The first tool: Visual Poetry. Now this is a relatively simple tool, but it could take student poetry to a different level. I can see students getting excited not just about seeing their poem in a different format, but in planning what shape or structure their poem will take when using this tool.  Shorter poems would work best- students might even take the most important words from their writing to create a visual.  This tool would also be something unique that students could use in writing workshop when they claim to be “finished”.  Take the activity a step further and have students reflect on why they chose that shape/format for their poem.  How does it compliment what you wrote?  And there is nothing wrong with creating visual poetry by hand too! 
I created this from a poem I wrote some time back. The good thing- Students are WAY more creative than we sometimes are.....     


You can find other ways to create/hack poetry Here


Hack Some Writing – Google Docs 

W.8.6. Use technology, including the Internet, to produce and publish writing and present the relationships between information and ideas efficiently as well as to interact and collaborate with others.

L.8.5. Demonstrate understanding of figurative language, word relationships, and nuances in word meanings.
 
Another idea is to create Found Poetry from a piece of writing.  In the #CLMOOC, Michelle Stein uploaded a document from something she wrote in reflection. She highlighted (or changed the color of the font) of particular words throughout the piece to create a ‘Found Poem’ and challenged the rest of us to do the same on her Google Doc that she shared.  I went in and created my poem changing certain words to green. And so on. The possibilities are endless in how students might use this technique. Individuals, small groups- assign a color and go! You could limit students to a particular paragraph, etc.  You could upload a piece of your own writing, a piece of student writing, even writing from an author or poet and allow students to hack the writing to create something new.  Students or the teacher can compile the created poems on a Google Doc, in Haiku Deck, etc.  and then hold a discussion on what processes were taken to decide on the words they chose for their poem. What stood out to you first? What frustrations did you experience? When did you know  your poem was ‘finished’?  What mood or tone is displayed based on the words chosen? What words have a strong connotation? What is the connotation? What do you think their poem means? Why? Provide evidence.

In this excerpt- three people took part- one in yellow, one used green and the other person used purple. 

 
Twitter Essay

W.8.4. Produce clear and coherent writing in which the development, organization, and style are appropriate to task, purpose, and audience.

W.8.6. Use technology, including the Internet, to produce and publish writing and present the relationships between information and ideas efficiently as well as to interact and collaborate with others.

If you are lucky enough to be able to use Twitter in the classroom, you might try a Twitter Essay.  (Of course with older students you might assign this as a flipped assignment) First introduced on the #CLMOOC and in this blog post- the idea is to provide a prompt for students to respond to  in just 140 characters (Including the hashtag).  Once students post, they are also required to find one or two student posts and respond in a peer review post. The teacher would have to be specific with the prompt as well as how students are to respond to each other’s ideas. I went to Twitter to find  #twitteressay and saw prompts such as:
What is the root of discrimination?
How has poetry affected your life?
Kevin Hodgson posted multiple Twitter Essays on hisblog-
Other ideas that would work like a Twitter Essay would be the six word memoir or tweet your life story in 140 characters or less, even flash fiction.  And if Twitter simply isn’t an option, try Edmodo or add your posts to a shared Google Doc- having students reply via comment option.
 

And to end- a really neat idea I’d like to try with students someday- Paper Circuitry

This site has a user guide, videos and how it connects to both language arts CCS as well as the Next Generation Science Standards. A great idea for Stem, an after-school program,  that last week of school, etc.
I can see students creating poetry – visual poetry- poetry in greeting card format- and adding lights to enhance it.  Talk about motivation!

  You can see additional ideas on writing at -CLMOOC Make Bank 

What kind of mini writing assignments do you do with students that motivate or inspire students to become life-long writers?  


Wednesday, June 11, 2014

Flipping the Classroom: Tips and Tools


I have been researching the ‘flip the classroom’ concept and consequently have been experimenting with tools that might facilitate that flip all while participating in the "CLMOOC" and the Morehead Online Summer Writing Project Institute. While there are many sources that discuss the pros and cons of the flipped classroom, I have discovered some of the main ideas that are important when considering the flip design.

  1. Keep it simple to start. Choose one class or even one lesson/ unit to flip.  See how it goes, reflect on the good and bad, even poll your students to see what worked for them and what didn’t. There is no need to test your sanity by trying to flip your entire classroom for the year.
  2. Pare your typical lecture down to what is most important. I like to talk. A lot.  And I suppose most educators do, but what I find is that I talk too much and if I had stopped or narrowed my ideas, it would have cost less time.  Take a look at your lecture and decide what is most important to get across. This forces us to really analyze what we present to our students to get it to more digestible, "bite sized" chunks of material.
  3. Accountability- What will you have your students do once they have viewed or read the flipped assignment? A journal entry, questions to answer, questions they still have, even an online quiz. There are many ideas as to what you  might have your students do to show they actually completed the flipped assignment. They can bring this product to class to add to discussion or gain points for completion.
  4. Assessment- The flipped classroom may involve more assessment than usual. You might assess them at home following the flipped assignment. Then the next day, you assess them again to see what they gleaned and what is still confusing. You can group them to work on those confusing points and assess students for that point only. Regardless of how you assess, the main idea that I saw that worked is that following the lesson, you assess students (clickers or student response systems work best). You can see immediate results and can tailor that day’s instruction accordingly.
  5. In-depth follow-up lessons for the classroom- After you have assessed student understanding, it’s time to dive into the lessons. What lessons, activities or collaborative work do you want your students to do with the basic information they gained from the previous flipped lesson? Providing collaborative work also allows students to help each other and if you have that student who refuses to partake in the flipped assignment, you can have them watch the flipped assignment in class or form a small group with the teacher, while the rest of the class is doing the collaborative or higher level work.
What Tools Are Available for the Flipped Classroom?
Jing- techsmith.com offers a great recording device- it allows you to video your computer screen while talking. You can record up to five minutes for free before you have to purchase the product itself. The finished recording provides a link that you can post for student access. No one can change it or delete it, they can only view it.
PowToons- A really fun video program where you can create videos for students on any topic of up to five minutes each. Like Jing, a link is provided for student access. You can also share the video to Facebook, Google Plus, YouTube and Twitter. One other option is that you can actually embed the video! 


Sophia.org- Sophia was pretty easy to use. You can create tutorials or playlists. Playlists basically takes many resources already made and places them in a progression for students to follow. Sophia also allows you to create classes for students to enter via a code, much like Edmodo.  I like Sophia best for the tutorial option. You can pull up an image or reading and create up to five minutes of voice over- recording your voice for a short lecture. You can also add other materials such as embedded videos from Youtube, PDF’s etc.


Mine below was my first try so it isn’t very in-depth. It is a basic lecture about the parts of a paragraph meant for my lowest students as a refresher. I was able to use the graphic I always use, record my voice discussing it, I found a fun song on Youtube about the parts of a paragraph (pulling in my musical students) and I ended the lesson with a PDF of a paragraph from bad to better and an assignment at the end. I also really liked Sophia because I am able to create a multiple choice quiz related to the material my students just viewed. The results of the quiz comes directly to me within the Sophia site.


BlendSpace – I think of all that I’ve tried this summer, Blendspace is one I like the very best. I can access materials from many sources to produce a play list of activities, reading materials and viewing delights for my students. Like Sophia, I can create classes and have students use a code to enter. I can access Google, OpenEd, Gooru, Flickr and many other online sources for materials and images.  I can also upload a document and insert a quiz and the site autosaves as I go.  The results of the quiz come to me within Blendspace for quick referral as well as other feedback from student use.


Teacher Dashboard to view quiz results, student feedback, etc.


 Take a look at my Blendspace creation below- You can share the video about the same way as PowToons with the addition of a QR code to access the Blendspace lesson and you can share the lesson to Edmodo. Yes, Edmodo! Since I use Edmodo, I was very excited about that!  


There are many other venues in which to flip the classroom. Educanon and Edpuzzle (where you can insert multiple choice questions throughout a video. The video pauses and the question and answer choices come up for students to answer.), Nearpod that is very much like Sophia. and the more familiar venue of Edmodo, and so many others. No one tool will perform the same purpose so it's important to play around to see which ones suit you best.

For a full article on findings about the Flipped Classroom Technique see:Flipping the Classroom  

Are you flipping the classroom? What tools and strategies do you use?


Saturday, April 26, 2014

Evidence in Writing Pt 2

In a June post, I noted an idea learned through the KY Writing Project- helping students find relevant evidence for points in an informational or argumentative piece. I was able to practice that in my classroom when we began an informational unit where students would be researching to support their main points. Before I get into that, let me explain how I go about helping my 8 graders develop their ideas for a research paper.

 First, students must decide upon their thesis. This article will explain... is our basic format and for higher level students I encourage them to go beyond that, using many models as support.

 Once students have developed their thesis, they are to develop three topic sentences, one for each point.

 Finally, they write their rough draft with NO research. Since we use bullying or cyberbullying, I know students can achieve that and this is why I use bullying/cyberbullying as our research paper topic. (I tell students my aim is not to teach you about bullying/cyberbullying, but to teach you about the research process.) Having students write FIRST before research, means less chance of plagiarism and they can successfully find research to support what they have said.

 After all this has been accomplished (with formative assessment checks along the way), students begin the research process. Since they have their topic sentence ideas- and after we have had a lesson on search terms- students are focused on what should be located in regards to research, rather than gathering every thing they find and becoming overwhelmed with information. Students used Google docs- typed their topic sentences in and under each copied and pasted a chunk of research that fit, as well as the full citation. We used KY Virtual Library as our main source, supplemented with no more than two Internet sources.

  Here are some quotes from students about the process we took:
"When we put the research under the topic sentences I felt that it helped provide structure and point us in the right direction to find what we needed." EB
" It was a good idea to collect research under each topic sentence. It helped sort our research out into parts so you didn’t just copy and paste it randomly on the research page and then have trouble finding your research for each section. It helped organize, at least my research, greatly." AB
" I did like writing our topic sentences first before we actually started our drafts, because it was a good way for us to gather our thoughts and really narrowed down the amount of research we had to do." ZB
" I liked collecting research under each topic sentence because it kept my research organized and it made sure I had research in all areas." LH
 And finally this quote where a student recognizes that if you research first, you might end up with little of your own thoughts/ideas:

"I learned that in order to form a research paper that is in, mostly, your words you must first write a draft in your own words without research. I did not know this before, usually I would research first and then build my paper off of that, which for me is a mistake. This is because the paper just ended up being just research with a few sentences of my own word."LK

 I was able to share my Teaching Assistant experience for Ashford University, where students would get plagiarism charges after reports from Turnitin revealed that the majority of their paper was from other sources rather than their own thoughts and ideas. And that while cited correctly, research should support the writer's ideas, not the other way around.


 Now, I do explain to students that it is easy to write a draft off the top of your head with a topic they know, but that later in high school or college it may not be that easy. Either way, developing your thesis and topic sentence ideasfirst  can still guide you as you research. We also practice A.C.E.- In this case, A is the Answer or topic sentence idea, C is the Cited research as support and E should be your Explanation or discussion, which should make up the majority of the paragraph.
 
 Now, on to the introduction lesson that led up to all this! I knew that students would have to locate relevant evidence for topic sentence ideas so I located many articles about healthy eating and exercise. An easy place to start, as most students have been inundated with this information for several years. Together we brainstormed everything it took to be healthy and broke them down together on chart paper into main ideas. From there we formulated topic sentences.

 The next day students entered to find desks in groups of 4 and manilla envelopes in the center with sentence strips and markers.

I placed the chart paper around the room- each sporting one topic sentence we developed from the day before. Students were to each pick one topic sentence and find an article that related to it, extracting a 'chunk of research' as support. One student placed each article out before the group- and each member had to decide which article would fit their selected topic sentence. They had to read (and we all know they skim it,  but that was dealt with soon after) and find relevant support.


They were to write their research chunk on the sentence strip and place it under the appropriate topic sentence.


 Things went well the first couple classes, but I felt it was too easy, and that students were not really reading, they were skimming,  so during my planning, I located several decoy articles. Ones that were related to exercise and diet, but not specific to the topic sentences themselves. I was surprised to find that in each class, at least one or two students gravitated to the decoy articles and were trying to use them as evidence. This offered an opportunity to discuss with them- HOW does this support the topic sentence idea?  As they began to verbalize how,  they soon realized it did not fit at all. This provided a short mini-lesson to the entire class- since all had seen those articles- to discuss why they did not fit our topic sentence ideas. I also asked them to be cognizant of the processes they were taking in determining the value of a particular source as support.

 Once students placed their research chunk under each topic sentence, we discussed paragraphing, relevant support and use of sources for support. Most importantly it gave them a glimpse of what research was like when facing multiple sources from which to extract research, some more valuable than others.


 Students did a gallery walk to view all evidence placed under the topic sentences, and they placed a check on the ones they felt were the strongest support for each topic sentence idea. We later discussed why some evidence was stronger than others. Some students also tried to use the ellipsis in their research chunks and this provided a good language usage lesson on successful use of the ellipsis.

 We also reflected on the question: "What process did you take to determine which article would be most helpful in supporting the topic sentence you selected?" Student answers were revealing. Some noted reading photos and captions, titles and subtitles while others read through carefully and of course some skimmed.This was an opportunity to discuss strategies good readers/researchers use to locate and find useful information.  In subsequent classes, we went back to this idea, discussing how a researcher can read the short blurbs under sites listed from a Google Search  or the short summary for articles found on KY Virtual Library. That rather than clicking on every thing found- one should pause to examine what they have found before plunging in and possibly wasting time and energy.

While it may seem like a no-brainer for middle school students to find relevant evidence, it is not. The decoy articles themselves proved that to me, as did other writing they did earlier in the year where they needed to extract support from the text they were reading.  This exercise provided many stop-and-reflect moments for my students, affording quick mini-lessons as well as a practice session for what they were about to embark upon- research for the first time.

This activity could easily be modified where the text - literature- a short story, poem, etc. could be the focus and the teacher selects a 'topic sentence idea' such as a character trait for the main character or an inference the teacher wants the students to see. This can become a close reading exercise in action.
Another idea is to see character change throughout a story- on chart paper place the  headings:
The character at the beginning
The character at the end
and have students place evidence from the text that portrays the character at these stages of the story.

The possibilities are numerous for such an activity and while it could be done on paper, individually, it gives those Kinesthetic and Logical students chances to shine as well! It also provided a model for how my students would be organizing their own research- under each topic sentence idea. Finally, you can check out my other blog posts- one in particular where students use padlet.com to post relevant evidence, and this technology tool could easily be used in the above lesson as well.

Sunday, February 23, 2014

Using “Public Response” to Formatively Assess: Is it working?


Recently I was able to present at the KCTE/LA Conference (www.kcte.org; “Kentucky Council of Teachers of English/Language Arts” on Facebook). I presented formative assessment ideas (check out http://mscodysclass.wikispaces.com/)  for resources and PPT) with the emphasis on how I needed to keep track of those results better and use them more efficiently in the classroom.One way I have been formatively assessing more is using the "Thumbs" method. Thumbs up- you get it; Thumbs down- you don't. The question I began to ask myself though, is this really a valid form of formative assessment? Read on to follow my line of thinking...


A couple of questions came up during and after the presentation that I think deserve time and discussion.


1.      What if they don’t know what they don’t know? And that often IS the case. We poll students, do "Thumbs", have them write down their questions in a reflection- but often the student simply is not aware of what they don’t know. To me the answer to this is continuous formative assessment and NOT relying on one method.


For example, if I did "Thumbs"- show me a thumbs up if you understand this concept (or skill), a thumbs down if you do not or a sideways thumb if you’re getting there but still a bit muddy. Two things happen- Students either automatically give a thumbs up or I watch some students looking surreptitiously around the room before they give their response.


If I were to rely on the "Thumbs" response alone, I would never know if students really did understand the concept; therefore, providing other means of formative assessment is the only way I will truly find out. While it is more work on a teacher, providing a non-graded opportunity to SHOW they know is the only way we will truly see that students understand the concept/skill. So I began to question if “Thumbs” is a good formative assessment at all.


2.      A second question was very similar to the one above but focused more on what to do with students who won't participate or participate honestly.  I began to think about other quick ways that students might respond to a formative assessment without having to do so publicly in front of an entire class. Peer pressure is powerful and we often forget that everyone just wants to fit in- be the same. And if we are not truly monitoring those results with the intention of doing something about it- what’s the point? A couple of thoughts came to mind in regards to public response as a formative assessment:


First, we have to ensure that our students feel safe and comfortable in our classrooms. We have to be real- discussing our own faults and weaknesses. I often will discuss my math “issues” with my students as an example. I tell them that if I were doing thumbs, mine would be down. I know I need extra help and I’m OK with that. I also discuss how learning is developmental and does not indicate “smarts”. For example- take two toddlers- one learns to walk at age 12 months while the other learns at age 14 months. Do we think one is more intelligent than the other? Of course not; it is developmental- and reading and writing is too! Reinforcing these ideas, discussing myself, laughing when I have a typo or make a mistake and using it as an opportunity to show I’m human, and the prevention of “making fun” in the classroom all promote a safe classroom learning environment that allows for my students to feel free to respond more honestly.

However,

That does not prevent it completely. We still have those students who just won’t participate or participate openly with an honest response.


Another idea then might be to provide a pack of post-its to students. They go through and number each one, with their assigned number, in the lower right hand corner on the back of each post-it.(They can use their assigned computer number, their Active Response System (clickers) number, etc.)   When it comes time to formatively assess, students can write their response- in a myriad of ways depending on what you are assessing:


A √ if they are good-to-go

A – if they are not following

A ? if they still need assistance.


Some might enjoy drawing Thumbs:


Either way, I would ask for some clarification in writing. What is it you don’t understand? State the idea in one concise sentence, what further questions do you have? Etc. That way if I get a thumbs up- I can truly ascertain if they really are following.


Providing a “Parking Lot” for students to attach their responses as they exit the room is the perfect place to post. You could even create a poster-sized Twitter or Facebook facsimile for them to post on, making it fun for them and informative for you. 


If you have one-to-one technology- use www.padlet.com where they can post on e-post-its with their response and number. 

Here's another system using Post-its and a "parking place" to post them: The Stoplight Method


The benefit to using a system like this:

  • Students are not pressured or embarrassed. You know their number and no one else does.

  • You get honest answers

  • You can DO something with these results without taking the time to pause in instruction and write down the names of students who say they are not following or almost there in their understanding. (which is obvious to students, requires them to keep their thumbs up longer and leads to further embarrassment for the ones who are not understanding).


And ultimately, that is the bigger issue- if you use "Thumbs" or some other public response as a formative assessment- are you writing down the results? Are you using that information to plan instruction? Formative assessment should allow the opportunity and provide the information needed to plan according to what your students know and/or need to know.  

Using the Post-it method,  I can pull the post-it’s off quickly at the end of class, slap them in my grade book for that class period, and return to them at planning time or after school to review and adjust instruction for the next day. Ultimately, I am not depending on honest results in an open poll of a classroom full of adolescents who don’t want “to look dumb” in front of their peers. And it is a better way to tackle those who “don’t know what they don’t know” in a concise and simple format that takes minutes to review. 


What do you do to formatively assess your students and more importantly how are you using those results to plan and modify your instruction? 

Check out NCTE's Position Statement on Formative Assessment Here 


Saturday, November 9, 2013

Narrative Mini Lessons and Padlet


My Students are wrapping up their study of Narrative and Style which includes Narrative technique. Typically I focus on developing effective hooks, including context and a thesis in their introduction, and narrative techniques including show don’t tell, dialogue, etc. 

One activity I do each year includes reading a distinguished narrative to identify effective narrative techniques and a scavenger hunt for hooks. 

In October, we held our first On-Demand Scrimmage with two narrative prompts from which to choose and write in a 40 minute period. I had the extreme joy of reading all 130 of them during Fall break and from that reading, was able to select one narrative that was distinguished in its use of narrative technique (show don’t tell, dialogue, effect hook and thesis, strong word choice, etc.)

Once we returned I put students in small groups of 3 to 4, with a copy of that narrative (with student permission and name deleted) and their task was as follows:

  • ·         Each member is to list one narrative technique that was done well with example.

  • ·         Together, justify the distinguished score using the writing scoring rubric.

They had to share the one technique they each listed on their own paper and then come to a consensus on which one they felt was the most effective and why.  They also had good conversation as to why the narrative was a distinguished, which opened their eyes to key words on the rubric that indicate narrative techniques one might use. 

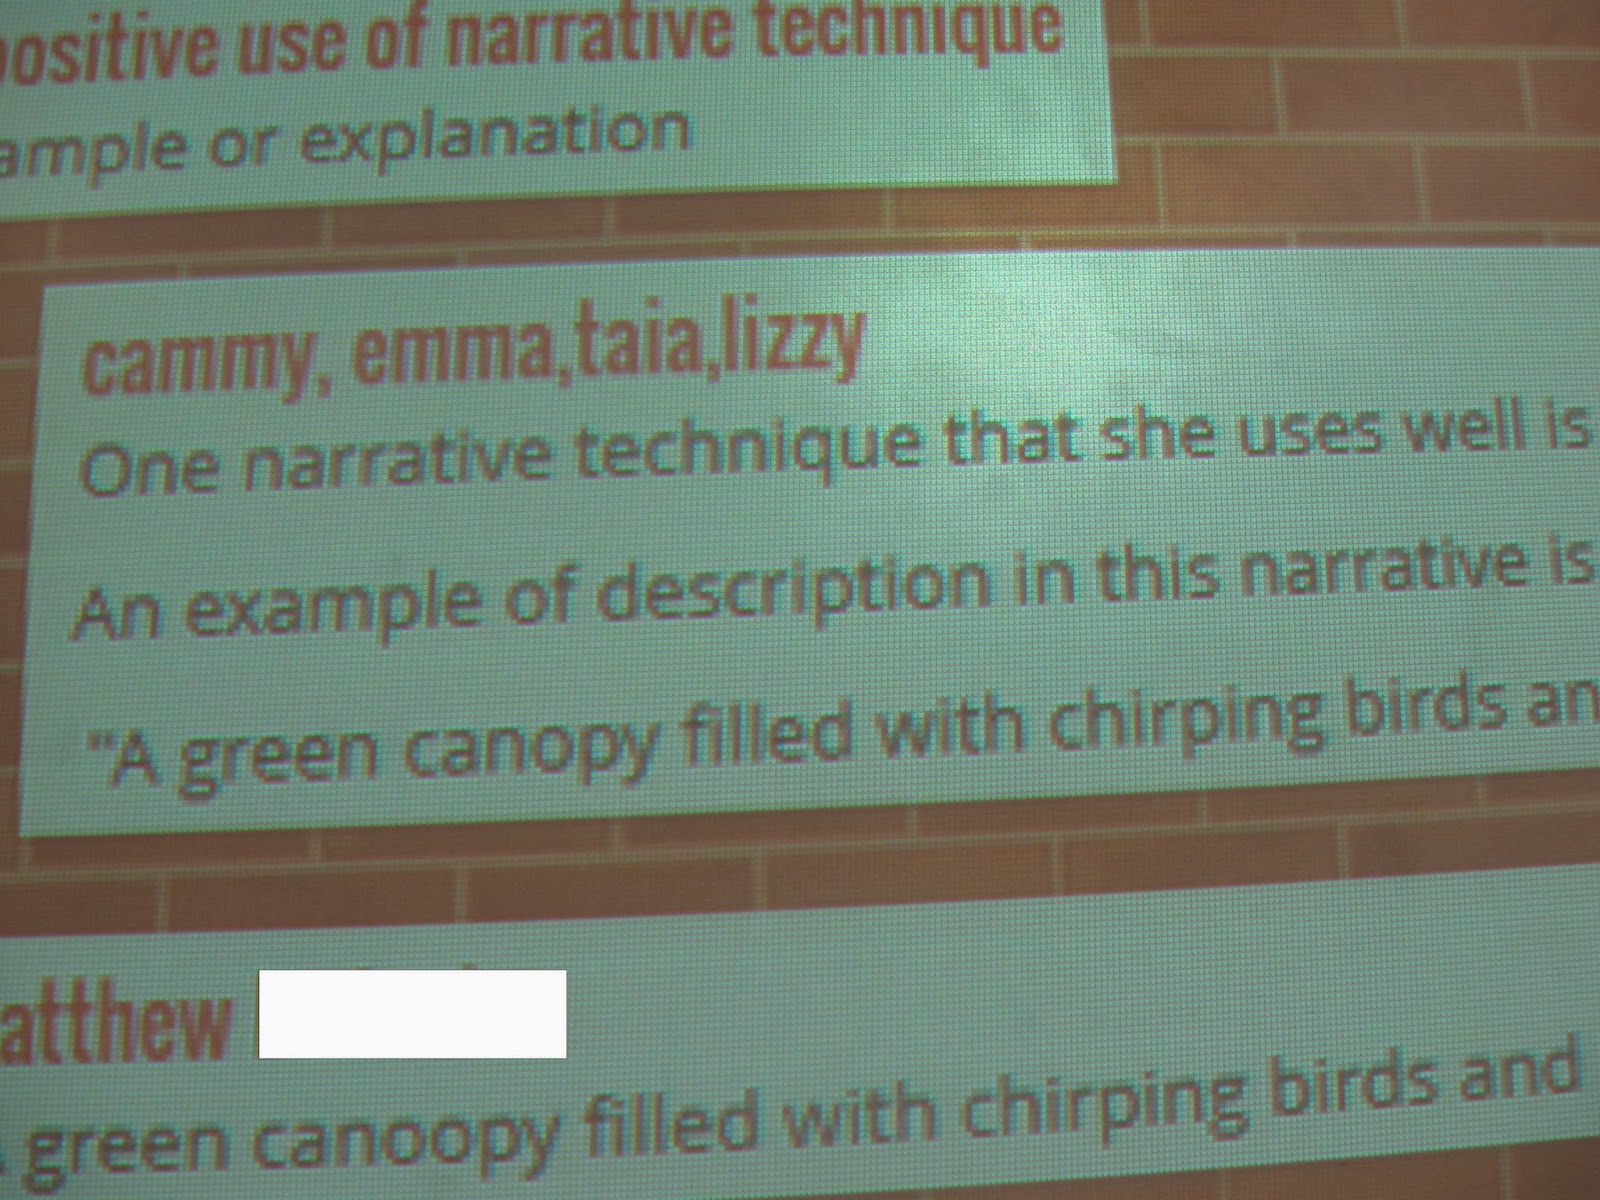
The next step was to send one group member to one of the four computers I have in my room and to use Padlet.com to list their most effective technique and an example or explanation. 


The rest of the group was to go to their own narratives and begin to make notes on what they might add to jazz up their writing.
I felt that every student was very motivated and all students were busily listing what they might add with no exceptions. I think seeing that it could be done, having a mentor text at their level,  and actually experiencing how good narrative technique can be incorporated,  influenced their own insight that they could also do the same in their own writing.
Toward the end of class, I refreshed Padlet on my whiteboard and students could see all responses, which we shared out to the whole class- again making notes on their own narratives as to what they might add. 
A screen shot of one class' contributions


The great thing about Padlet was that I could print or save it as a PDF and actually have more samples of hooks  to use  for future instruction! Less work for me, since the students were the ones who did the discovering and the work in typing them.

Another activity we did was a scavenger hunt for good hooks/effective leads.  We had taken notes in our journals on the types of hooks/leads and looked at and labeled types of hooks I had previously gathered from NPR’s  This I Believe site of hundreds of essays. (I copy the entire introduction, because later we also label the context and thesis statements as well.) 
In our activity, Students had to look through young adult novels and children’s books (that I had and our librarian gathered on a cart for us) and had to list two hooks found and label each with the type of hook.
From there, students participated in a carousel activity where they each had to list one hook on large chart paper that had been labeled with the types- they had to find the appropriate labeled chart paper and write their hook down with the title of the book. (We had some good conversation on citations, use of quotation marks around exact words and how to punctuate a book title). 

Next step, you guessed it! After sharing out to the whole class, they had to  go to their own narrative and create two types of hooks for their own- each labeled with the type of hook. I was thrilled with some of their creations- Devon created this one:  “I couldn’t believe he had bit me. Again!” 

By reviewing the hooks, I was able to see who was getting it and who was not and put smileys by really effective hooks to help students decide on which one they would ultimately use.
I include this activity not just because it is a narrative activity, but because Padlet could have easily been used for this activity as well.
Incorporating technology and student discussion is easy when you have a well-developed plan and a tool like Padlet at your fingertips (for free!)