Saturday, June 22, 2013
My Memoir in Books
Tried a new website- Stupeflix Video! Inspired by the #CLMOOC,in conjunction with the National Writing Project. I decided to create my memoir in books! The site allows you to create one free video and for $5 a month, you can create away! Even has an interview movie maker for those interviews you want your students to create! As I gathered the images for the books that have shaped my growing up and adult years- a story developed and I realized what a wonderful project this could be for a narrative- "My Life in Books" or a memoir on those who inspired me, the reader. I thought about how my mother would read to me and how she would make up stories- my favorite- the talking bus that would come around our neighborhood to pick all the kids up, including me, for school. Later my grandmother inspired me - she was an avid reader herself and it wasn't long before I was into The Hardy Boys and Nancy Drew. I wanted to be a detective as a result of those books. Later I began reading Stephen King and I recall the first book, Carrie, I had to sneak and read since my mother wouldn't allow it. And the stories go on and on- all conjured from memory as a result of this project.
Friday, June 21, 2013
Infographics and Research
CCS W.8.7.
Conduct short research projects to answer a question (including a
self-generated question), drawing on several sources and generating additional
related, focused questions that allow for multiple avenues of exploration.
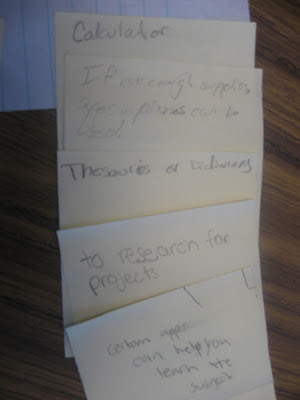
I have been thinking about infographics – a visual
representation of data. A topic that many are discussing on the CLMOOC- http://blog.nwp.org/clmooc/ One area that I fail to give enough attention
too is research. The CCS states that students should participate in short
research projects, and all I have managed to fit in is one major research
project and a resulting research paper. SO the idea of infographics caught my
attention.
With the possibility of Infographics, students can think of
questions they want to answer and they can create an infographic to not only
display the resulting information, but they can share this information thus
utilizing the speaking and listening skills as well.
Some questions I
thought of include:
·
Do teenagers get enough sleep? (Polling students
on the number of hours of sleep they get on average each school night)
·
Does good organization correlate with good
grades? (I thought maybe they could poll a number of students on use of their
agenda book, use of locker, use of a folder system/binder and what their
average grade is in their classes….)
·
Should school start later in the day? (Polling
students on a scale of 1-5 on how sleepy
they are in the morning, afternoon and late day)
·
Does education pay? (Researching statistics on
pay scales in relation to level of education)
I also stumbled upon a Kids
Count Contest for Infographics that offers a cool research tool that kids
might utilize to research information about kids and their well being across
the US or even in their own state- http://sparkaction.org/content/how-create-winning-infographic
Of course my hope is that students might also generate their
own questions in which to poll others in the school for the results.
Showing students Infographics and why they are used, their
importance, and their benefits would be our first step after we formulate the
question, carry out our research, and compile our results.
Some great sites that offer teaching tips and examples include:
10 Awesome Free Tools to Make Infographics http://www.makeuseof.com/tag/awesome-free-tools-infographics/
Creating Infographics with Students- http://langwitches.org/blog/2011/09/06/creating-infographics-with-students/
Both of these sites provide a great introduction to
Infographics, examples, and tips on best practice. The Infographic site that I have been
experimenting with and have found good results and ease of use is http://www.easel.ly/ It is
still in Beta form at this time.
This site has some fabulous samples of Infographics as well!
Another recommended easy site is http://piktochart.com/ The downside is that you have to log in to
save the Infographic, and that might be a problem for students in a school
setting. There is no way to print the graphic, so I will have to continue to
experiment with different venues to find one that might work for students in a
school setting. I do know that Google has some capacity to build charts and
graphs, but many schools (mine included) do not
permit students to use Google in
the classroom setting.
That’s not to say that student couldn’t create their Infographic
by hand or even using Word, and the Kids Count site noted above does discuss
this as well. The great thing about
kids, they are VERY innovative and creative and I am always amazed by what they
are able to produce when left to their own devices.
Another aspect of the CCS I think might work well here is the
CCS RI.8.7. Evaluate the
advantages and disadvantages of using different mediums (e.g., print or digital
text, video, multimedia) to present a particular topic or idea.
Provide
the same information in an article, via a video and in an Infographic and have
students compare/contrast the advantages and disadvantages of each medium and
its ability to express an argument, to convey information, to persuade, etc. I
was able to do this with the dangers of smoking. My students read an article
about the dangers of smoking, they watched a video of “Dr. Oz” discussing and
showing the dangers of smoking and I showed an Infographic that showed a person
with diseased lungs, yellow teeth, etc. each body area labeled to discuss the
dangers/effects of smoking. ( I just went to Google Images and searched for effects
of smoking) Hands down the kids preferred the Infographic and provide some good
reasons why. They enjoyed the activity and we had good discussion on the
benefits of each format as well as the disadvantages for readers.
Here is a
great blog post on implementing Infographics in the classroom written by Chris
Miller, a middle school teacher in Wisconsin- http://mrmillernyr.wordpress.com/2013/06/21/clmooc-reflection-infographics/
His blog is titled- “The Second Level:
A Middle School Teacher’s Perspective”
Amy
Wednesday, June 19, 2013
Evidence in Writing
I attended a Common Core Academy held by a local writing project and participated in two noteworthy activities that involve prior knowledge and supporting evidence. The below activities are not my own creation and were generated through a group of teachers and administrators.
 In this activity we were asked to read from a children's picture book and the challenge was to find or "lift a line" from the text that supported a character analysis. The character "X" is resilient. Find something in the text that supports this character trait. In small groups, we each read the story and worked to find something in the story that would support this character trait. As we placed our evidence up for all to see, the instructor led us through a mini-lesson on the types of evidence one might find in a story- dialogue, quotes, inference, etc. This would work very well for middle grades using a higher level text. Character analysis, evidence of theme, etc. might be the focus and students work to lift a line or find evidence that supports a particular theme or character trait. I can see using this method to discuss writer's craft and how a writer helps the reader get to know the character- through dialogue, action, what others say about him/her, etc. What do we know about this character? What is he/she like? Lift a line that portrays who this character is as a person. A mini-lesson can follow where you discuss how a writer introduces and develops a character.
 I wish I could turn this picture around- I actually did so in Paint, but now it comes up like this anyway...sigh...
Nevertheless, in this activity a topic was introduced- what do you know or think you know about proper nutrition? In small groups we listed everything we thought we knew about this topic. Next we were given multiple articles- they were short and in some cases excerpts- and our goal was to find evidence that supports at least one thing we wrote down on the chart paper. We had to list the evidence and source on a post-it and place the Post-it next to the line which it supported.
I can see this working for many topics, it can help students achieve those short research projects noted in the CCS, and it can assist in learning how to find evidence and how to cite it.
In addition, one might use this activity in order to counter-argue as well. If students find information that is the exact opposite of what has been listed, you might color-code your Post-its and use hot pink for example to show evidence that does NOT support that information. A counter-argument mini-lesson or even how to introduce a counter-argument mini-lesson might come from this extension.
Saturday, June 15, 2013
Argumentative Writing: A Pre-write Activity
Pre-Writing Activity
Argument (although could work for Informational writing too!)
CCS: W8.1; 8.4; SL 8.1
When students began to think about their first argumentative piece, convincing our Site-Based Council to allow cell phone use in the classroom, I knew that many students might struggle with three or more sound reasons for allowing cell phones in the classroom. We read many articles about how other schools were using cell phones as well as articles that listed pros and cons on the issue. I decided I wanted a more collaborative approach to developing possible points and here is what we did.
Students were given about 4 post-its and on each were directed to list a possible use for cell phones and/or reasons for having a cell phone. Students worked independently to list at least 3 or 4- one per post-it.
Once completed, students were put into groups of 4 or 5 and they were directed to share their ideas.
The next step was then to come up with categories for these ideas (safety, tools, etc.) and to place their post-its in the appropriate category. Students had to come up with their own categories and while most did well, I moved about the room offering advice if needed.
 |
| Students collaboratively organizing their ideas |
 |
| Students Have organized their ideas into three categories or points |
 |
| Here students have categorized many of their ideas into a "Tools" category |
 | ||||
| Students organizing their ideas into categories |
Once finished, students shared out their categories and what "points" fell into each category.
My hope was that students would understand that many ideas can fit into a category, which in turn will produce a "FAT" paragraph. Often times students end up creating points that are very similar and they repeat information. By using this technique I was hoping that students would have the opportunity to think critically about brainstorming ideas, categorizing those ideas, and organizing them from least to most important. All of these skills are needed to write a cohesive argumentative piece.
Lego: Writing and Following Directions
Informational Writing -
CCS: RI 8.4; W8.2
Students often think that following directions are super easy, but we find out just how difficult it can be with our informational Lego Direction Writing Activity.
First we look at vocabulary. Words such as
Horizontal
Vertical
Adjacent
and other spatial words they may want to use. I encourage kids to use the vocabulary in their directions, which embeds the meaning and puts it into practice.
Step One: Each partner group chooses about 15-20 legos and together plan a design.
Step Two: Write your design building down step by step. I encourage one to build and feed direction to one writer.
Step Three- Once finished, you will take the lego design apart (I take pictures of the designs to show the direction designers' version compared to the builders' version)
Step Four- Give the pieces and the written directions to a set of builders.
Step Five- The builders attempt to use the directions to build the Lego contraption as it was originally built.
Step Six- Once built, the designers give feedback if it is incorrect and builders attempt to get it correctly built.
We compare pictures of the two after the second (or third) attempt.
Step Seven- The builders write feedback on the directions sheet- what was easy, hard, what information was missing, etc. and they give the Lego contraption and their feedback to the original designers, who then reflect themselves on their directions: what was easy about writing directions? What was difficult? etc.
We compare pictures of the two (original and builders) and as a class discuss what was difficult about writing and following directions.


Wecome!
Welcome to Writing in the Middle! Hopefully you will find lots of great ideas for integrating writing instruction in your classroom in a fun, collaborative, and often, hands-on way!
Badges:

Badges:
Subscribe to:
Posts (Atom)